Guest Haus Part Zwei (2)

The Guest Haus Part zwei (2)

One of our first blogs talked about the Guest Haus and the inspiration for its design.  (See June 19, 2020).  Our vision was to design the space to be very simple with subdued colors.  We have stuck with the core design features and are thrilled to bring to you this absolutely charming space.

As you walk thru the front door you enter the great space.  There are huge windows overlooking the meadow from every angle of this home.  The great space has a stone fireplace and 20+ foot ceilings with a fantastic beam running down the center. The flooring is a Luxury Vinyl Plank.  I have used a similar product but was quite pleased with this selection as it lays like a wood plank or tile and is known for its durability.  It is also produced in the USA.  

Throughout the main areas of the house we started with a base color of SW 7627 White Heron and completed all trim and doors in SW 6071 Popular Gray.  

Off of the main space is the well appointed kitchen. The Kitchen Cabinets were finished in SW 6071 Popular Gray.  The appliances are Bertazonni and I am in love with the look and the features this appliance package offers.  The backsplash and countertop were both selected to keep with the very calm and peaceful feel we wanted to create for this space. 

Down the hallway is where you will find the amazing bathroom with Claw Foot Tub and separate shower.  The Bathroom is where we decided to add the true color for this space.  The Walls are SW 6071 Polular Gray with the cabinets painted SW 6236 Grays Harbor.  

Next you will enter the bedroom.  This room has a number of windows as well to allow the outdoors to come in.  

This charming cottage also has a lovely loft overlooking the living room. The builder is completing the rail system.

Punch lists are being created and the final days lie ahead of us. We look forward to moving soon. Let’s just see where we are in the next two weeks. Cheers.

The Journey Home

It has been two weeks since our last post and the house is just buzzing with activity. The journey home gets closer as each day passes. Andy and I are very excited to begin this new journey and hope to spend both Thanksgiving and Christmas in our new Custom Home with family and friends.

The interior continues to move forward and we are in the final weeks of cabinet, granite, tile, and floor installations. The main house is almost complete and we will start to put our punch list together. Exciting news is that the appliances will be delivered this week and plumbing should be complete very soon.

Pantry/Planning Office off of the mud room (trim still in progress)
Dining Area off of the kitchen

The Guest House is also coming together nicely and should have its flooring installed this coming week. I’ll run a feature on the Guest House next week with a focus on the bathroom and kitchen.

Guest House Shower – Matching Wall on the Opposite end with Claw Foot Tub
Guest House Bath Vanity

Work should begin on the exterior landscaping very soon. We’ve put in the pad for the outdoor kitchen and the patio off of the back of the house.

Here comes the truck
Outdoor Kitchen Pad
Patio off of the back sitting porch
Front and Side Porch Railing – to be stained the same color as the posts

It really is starting to come together. We hope to see dirt moving and grading this week with the installation of a small fenced area encompassing planting areas for both houses.

We hope you enjoy seeing the photos on our progress and I’ll try to do better next week with a full spread on the Guest House.


The Master “Sweet”

We have had an exciting two weeks on the job site.  It’s one thing to see the actual structure begin to take shape, but it is a totally different feeling when you see your designs start to materialize.  I still get goosebumps when it all get’s pulled together whether it is our own home or we are working projects for our clients.

Over the past several weeks the site has been very busy with the painters, the electricians and the tile installers starting to pull everything together.  The Master is one of my favorite spaces.  I had an opportunity to work with my dear friend Cynthia on the concept and I hope you enjoy it as much as we did in designing it.  

Before leaving Tucson I was able to work with a local upholster to create and build our headboard.  The fabric we selected is pretty bold and will be used for draperies for the back glass wall for privacy. We will use a shade for the other windows in the master bedroom, sitting room and closet.

The master bedroom walls are painted Sherwin Williams – Pearl Gray with an accent wall in Sherwin Williams Silvermist.  The spa bath follows in Silvermist. 

The tile selected for the Master Bath comes from AZ Tile and is produced in Italy.  This Vetri series is a rectified glazed porcelain tile.  If you look closely you will see each tile features a shadowed perimeter to give the illusion of a pillowed edge.  I loved this tile as the edge detail combined with its polished surface gives Vetri the look of a glass tile.  Unlike glass tile, however, this particular product is suitable as flooring and will require minimal maintenance.  We used the Vetri Bianco (whitish tone) to outline the floor and as the pencil liner in the toilet area.  The Vetri Naturale (greyish tone) was used in various sizes on the floor, shower, and toilet walls.  

The back wall of the shower and the bathroom countertop is an agglomerate marble.  You may notice it is made up of small pieces of stone, fused together using resin.  We selected Palladio Doge and it has a mix of white and light grey marble pieces that have been tumbled and then mixed with a white resin as a binder.  

I cannot wait to move in and enjoy this “Sweet” and serene space.

Here is a sneak peek of what’s to come.  

Master Fabric – Headboard, Drapes, Coverlet and Dust Ruffle
King Headboard
Master Bath Floor
The Blank Slate
The Finished Product
The Toliet Room

Until Next Week….

The Laundry Room

I’ve had a fascination of the laundry room for many years.  Sitting back with my dog in my lap I contemplated on today’s blog.  It’s warming again in TX and there is a slight breeze in the air.  I am sipping a diet coke – which I really try not to do, but I had a weak moment and needed the kick to find my inspiration for this week’s blog.  The Laundry Room – – as a child I remember my mother telling the story that when she was pregnant with me or shortly thereafter my father bought her a dryer.  (He did not want her going into the cold to hang diapers.  Hold that thought back to “hanging laundry” in a minute.) But her washer and dryer were always in the garage.  Maybe that is where this all started.  

My father was the inspiration for my love of design.  From the time I can remember he was renovating our home.  He and my mother worked side by side and took an 1100 sq foot home and converted it over 20+ years into a lovely 2500 sq ft home.  They not only handled all of the construction but they worked together to build cabinets and design paneling because what was in the stores would be too expensive for the budget.  We were in constant build mode.  BUT the one thing we never had was that laundry room.  I remember my mom always talked about putting a wall up in the garage to protect the precious space but it just never was a priority.   Andy has joked over the years with me on why this has to be a big room. I guess now I know. 

 I wish I had a picture of the laundry room we created when we built our first home in Edgewater, MD.  We built a 5 bedroom home (why – who knows) where we converted 1 bedroom upstairs to the laundry room.  At the time I was fascinated with Walt Disney and Mickey Mouse.  The flooring in the room was the square black and white linoleum – you remember it by Armstong!  My dad crafted small Mickey heads as the face of the drapery rods painted black with red tabbed drapes.  We finished it off with an old chair that I wanted recovered in Mickey fabric.  But trademarked fabric was very expensive and not in our budget.  We lucked out as we were at Disney where I found Mickey embossed towels.  Talk about innovation.  I bought the pool towels and a friend made the chair covers for me.  I loved that laundry room.  It is still my absolute favorite to this day.  

The laundry room in the new house is not large, but it will be functional.  In the original plan the entry was from the guest room side.  I had the builder open it from the master side and then decided to leave both entrances as a pathway. There are two doors so it can be closed off.   I also like the feel of the openness since it is not a large space.  It’s pretty basic.  Our Washer/Dryer will be on a shelf so to speak with slots for “cool” laundry baskets below.  The W/D add color to the space (they are Burgundy) and we have cabinets above them.  We also have a small folding area and above that will be a wet rod area with a 2 tone picket tile backsplash accenting the walls.  The cabinets are white (it was all I could do not to paint them pink).  But I will add Burgundy, Black and Pink accents to tie it together.  

Colorful Washer/Dryer
Two-toned Pickets

Remember I mentioned about the “hanging of laundry”.  Funny story.  My dear mother in law never had a dryer in her entire life until she moved in with us in 2010.  At that time she was 85 years young.  We moved into a home in an HOA managed community and she wanted a clothes line.  Well I pulled out my HOA docs and low and behold there was no mention of clothes lines.  I surmised at the time the young lawyers now drafting these documents had never experienced a clothes line.  They mentioned flag poles, tv antenna’s, and things like that but nothing on a clothes line.  I happened to mention it to the builder and he did not have a problem with it as long as our neighbors did not.  Well all I can tell you is we had a very lovely retractable clothes line that all of the neighbors wanted to enjoy and in fact we installed several of them for our friends.  So here’s to our mom’s who paved the way for our laundry rooms today.  

Until next week…

Let There Be Light

This was an exciting week at the house. All of the light fixtures (with the exception of two little sconces for the powder bath) were delivered and it was time for install. 

Lighting design is so important when setting the tone for one’s home.  Way to often lighting design misses the fact that how we light our homes both inside and out says a lot about who we are and what is important to us.  

My dear friend Cynthia Cross discusses how every room is a layered composition.  This layering includes the light coming thru the windows (be aware of your window tint), the paint, the furniture and the materials used in the space.  

There are three basic ways to light your home.  The first is Ambient Lighting.  This type of light provides general, all-purpose light.  These would be our many cans we have installed.  (The first layer)

The second type of lighting is Task Lighting. Task Lighting is used to provide light for certain tasks, like reading a recipe in the kitchen.  These lights are not used to light an entire room, but to illuminate a small area. Examples would include under counter lighting.

The third type of lighting is Accent Lighting.  This is the fun part of the project and where the layering begins.  Accent lighting is the most decorative lighting in a room.  These lights can create focal points in your home and include your chandeliers, sconces and lamps.

In our plan we began with the light coming thru the glorious windows and the Ambient Lighting in the contractor’s plan.  We then built on that plan working thru each room defining the space, the lighting required and considering the Urban Upscale Farmhouse style we were creating.

The Great Space will be an area where we entertain and relax.  It also acts as our entryway where we welcome friends and family into our home.  We selected a substantial chandelier that will be installed in the living space.    We also added art lights at each end of the room to highlight future art pieces on the board and batten accent walls.  We will install dimmers to control the brightness and set the mood for the space. 

Great Space Chandelier – to be installed this week

Looking back into the kitchen and dining area we have selected pendant lighting and another chandelier to hang over the dining table.  

There will be 3 pendants for the island

Going into our master we felt we needed warm lighting.  Our master bedroom and bath both have chandeliers that work together well.  In the photo below you will see that we have the holes cut for the vanity lighting but they have not yet been installed.  These lights are going to be placed directly on the plate glass mirror that will be over our vanity.  

Master Bedroom
Master Bath
Master Bath Vanity – waiting on plate mirror

We have also added a number of ceiling fans in the plan as well.  In our guest room (Andy’s Media Room) we have opted for a fan and will use table lamps to add dimension to the space.  

We’ve also added fans to our back and side patio to give us that farmhouse feel.  

Each room may have a different lighting scheme but ultimately when pulled together it sets the stylistic tone for the entire home.  One we hope you find warm and inviting.  

Need help in designing your plan and selecting your lighting…send me an email at loriweberathome@gmail.com and let’s set up a time to discuss your project. 

Until next week…

Looks Like We Made It!

Sound familiar? I believe Barry Manilow was the inspiration for this blog. (Lyrics revised)

Looks like we made it (To TX)

Left AZ on the way to another town (Fredericksburg, TX)

Looks like we made it (To TX)

Or I thought so til today (when we had to unload)

Until stuff was there/everywhere

And all I could taste was cardboard boxes the way we packed them.

Andy in a 26 ft Penske Truck and Olivia, the two dogs and I in the Jeep with a 12 ft UHaul.  WOW – quite the adventure.  This weeks blog will be short as we are recovering from unloading with help from Unique Movers (thank goodness) in 105 degree heat yesterday.  Here are a few photos for your enjoyment.  Much more to come next week.  The interior is coming together.  Paint is just about complete setting the tone for the project and the tile is in progress.  

Not Andy:) This was packed by jigsaw puzzle masters in Marana, AZ
Can you tell we were tired when we packed this small trailer?

Cheers….

The Big Move

Just in case anyone was wondering what happened to last weeks blog – – well it got taken over by the move process.  Our house in AZ is set to close on September 18th and we decided after 26 years of corporate movers, we could do this ourselves.  (Seriously what was I thinking). Well with a lot of help from Olivia and with Andy on Box Manufacturing and in charge of meals and hydration we are getting thru the packing process.  

I’ll be the first to admit moving can be both physically and mentally exhausting in the best of times.  Moving during a pandemic presents its challenges but we are all being super careful.  This will be our last shipment from AZ to TX so we are enlisting a company to help load and unload our truck.  Andy will be our truck driver (26 ft Penske with tow vehicle).  He loves to drive our RV so we thought why not?  We will mask up and have 4 “guys” who will load our truck on this end and then we have a similar team when we reach our destination.  

We’ve always been fortunate enough to have door to door moves so this one seems a bit daunting in that we have to move into storage until our house is ready.  The good news is that we have had time to label and pack our boxes ourselves, getting organized on this end will help when unpacking on the other end.  

A recent article on Houzz about moving made me think about the steps we’ve taken to get organized and ready for the big day. I thought you might find these tips helpful if you are planning an upcoming move.   

  1. Create a Schedule – I live by my Day Planner – add the design work in with packing and moving and my schedule is pretty full
  2. Declutter – many charities today are in need of donations.  Make decisions early to “let it go”.  Don’t get “Frozen”.
  3. Set up a staging area – clutter often creates an issue for people (I am one of those people). Try using an empty room to place all of your packed boxes.  This will help come move day.
  4. Rent a dumpster – We did not do this for this move, but I have done this in the past.  It makes the declutter and cleaning process much easier.  Just no dumpster diving!
  5. Sell items of value – well I am not good at this – you can try it on local garage sale sites, NextDoor, FaceBook Marketplace – Good Luck. 
  6. Boxes, Boxes, Boxes – make sure you have the right tools. Buying the right boxes, tape dispenser, paper, bubble wrap, etc really helps with the packing process. Both Uhaul and U-line have a great selection of boxes.
  7. Keep Track of your Packed Boxes and their Contents – My bestie Olivia is REALLY good at this – me not so much.  She has #’d her boxes and recorded their contents.  I have always been lucky if I could get the contents on the front of the boxes.
  8. Room Destination – Label each box with the room where you would like the boxes to go on the other end.  Make sure to write it in the same place on the box so that on move day things go smoothly and efficiently.
  9. Art – if you happen to have art I highly recommend ordering art boxes from U-Line.  Take photos of the art and record their sizes.  This makes art installation on the other end that much easier.  
  10. Pack a Parts Box – one of the things Budd Van Lines taught me early in my career was that we need to have a parts box.  This box holds all of your electronics cords, remotes, etc.  Small things that could get lost.  If you are traveling by car I highly recommend carrying this with you.
  11. Create a Day 1 Box – I love to have a box with TP, Paper Plates, Dish Soap, Flashlight, Hammer, Screwdriver, Box Cutters, trash bags and an extra box when you unpack all that paper.   Make sure to include items needed to take care of you and your family Day 1.  Label Pack Last and the movers will load last but it will come off the truck First. 
  12. If you have pets make sure you have a pet box.  Moves for our furry friends can be very stressful – remember they feel our stress.   Pack their favorite toy, blanket, food, treats and vaccination records.  You may want to have them in day care during load or unload so the vaccination records will be handy.
  13. Keep Valuables with you – Always keep your important documents with you like your passport, birth certificates and social security card to name a few – – even if you are transporting a safe.  You could be separated from your shipment or it may go to storage and you want access to these valuable papers.
Rufus and Pistol settled in for a nap (and out of the way:)

Remember to eat healthy, stay hydrated and get the proper rest.  Move day is right around the corner.  

P.S. In our recent blog on the outdoor kitchen we asked which design would you select? We have decided on Design B with a modification. We will build a concrete pad vs the crushed granite .  Also, the interior of our Cookhouse is taking shape.  See photos below.  

Front of Cookhouse. Outdoor Kitchen will be installed on the right

My crew moving in the indoor cabinets
Puzzle Pieces – How will these all fit together? I picked these up from a contractor who could not use them on his job. So I needed to lay them out to see how they would work in the space.
We created a line of cabinets on the outside wall – the countertop will be a black tile with an Emser Ombre Blue Backsplash. We’ve created an island that will have a sink and workspace. The floor will remain concrete.

Until next week…

Hardware

It’s been a bit busy and stressful this week.  The good news is our home in Marana, AZ sold.  The bad news is now it is time to start packing.  This week was spent trying to pack everything we could load into a 27 Foot Penske Truck that Andy then drove to TX.  After 13 hours on the road we arrived early Thursday morning (or late Wednesday night depending on your perspective).  We had not been to the job site in over 6 weeks and the progress was amazing.  It really is starting to look like a home.  After taking a day off, we unloaded our truck with help from the Penske movers (I highly recommend) and I was ready to engage again on the project.

The most exciting part of this trip was seeing all of the cabinets, first sitting in the middle of the floor, and then within 24 hours having them all set in place with the trim!  

Guest House Kitchen
Main House Large Island

The second exciting reveal was that our doors are in.  I am in love with the look of these 4 panel doors.

So what is next?  That is were the title for today’s blog comes in – – on to Hardware!  Almost 2 months ago I started researching both door and cabinet hardware.  Once our “style” was set I was able to work down to the specifics.  We have chosen Kwikset Smart Door Hardware for the front door of the main house as well as the guest house.  We are keeping things very simple with Vancouver and Halifax Levers.  Next was the cabinet hardware.  We wanted to make sure we had a cohesive look throughout.  Who knew there were so many options. The Hardware often serves as the icing on the cake. The Main House will come from The Hardware Hut and supply.com.  The Guest House is also from The Hardware Hut.  My favorite are the pulls for the kitchen and master bath.  Check out Colonial Bronze Solid Brass Knobs and Pulls from Hardware Hut. 

The Master Bath is coming from supply.com.  We are using the Brizo Invari Drawer Pulls in Luxe Gold. 

I will be on site this week meeting with the tile installer, granite fabricator and others.  Then back to AZ for the final pack and move.  Great progress is being made and we cannot wait until we can sit on our back porch and watch the deer and antelope play (well maybe sheep instead of antelope).  

Until next week….

The Outdoor Kitchen

So how does one spend their Saturday you ask – – drawing various Outdoor Kitchen Designs of course.  In my first installment I mentioned I spent a lot of hours as a child with my dad’s T-Square and a drafting board across my lap.  Well today I took out my graph paper (my very good friend Jennifer bought for me – thank you) and sat down with my pencil, scale and eraser!  And here I am 3 designs later with the inspiration for my weekly blog.  

Andy and I have been discussing the elements of an outdoor kitchen since the inception of this project.  I can imagine myself sitting under the large grove of trees with Andy flipping burgers to the laughter of our friends or sipping wine while a pizza bakes in the Wood Fired Oven. The equipment has changed several times but the Wood Fired Oven has remained a constant.  

One of the greatest benefits of an outdoor kitchen is that it extends your outdoor living and entertaining space.  As we were considering our design we made several trips out to the site to take in our new surroundings.  As we brainstormed our design and space I needed to consider the Farmhouse feel of the home’s exterior.  The colors and textures selected are meant to compliment the style. Our design is taking advantage of the slanted tin roof that will provide shade to the overall structure. 

Cook House with Corrugated Metal Exterior

Next we needed to decide what appliances we would like to build into our outdoor kitchen.  There are so many choices and this needs to be a very personal choice.  We needed to think through how we were going to use the space.  Andy initially started with the thought that we should have a commercial range in our kitchen – – He just loves Guy Fieri’s outdoor kitchen on Diners, Drive-Ins and Dives! (side note: we have visited many over the years) We nixed the commercial range but we will have a small gas grill, a small Santa Maria BBQ Grill by Sunterra Outdoor and the BBQ Pit Boys, and a Wood Fired Oven.  In addition, Andy has a Big Green Egg x 2 we will bring into the mix.  The appliances drove our layout.

Gas Grill for Burgers and Steaks
Santa Maria Grill for BBQ Adventures

Layout is just as important in an outdoor kitchen as it is for an indoor one. There were other considerations for our outdoor kitchen as well.  As we planned to use the space outside of the “Cook House” we needed to consider how close the appliances would be to the building and how the surrounding trees might impact the design.  For this reason we placed the appliances on the opposite side of the building wall.  The cabinets will be placed on a concrete slab and the Wood Fired Oven has been planned at the end of the run away from the house and the trees.  The “walkway” will be crushed granite for any spills that may occur.  Note: we have included 64” of  stainless steel countertop for food prep.  A small under counter refrigerator will be inside the Cook House to house all of the cold beverages required while cooking!  We have decided to outfit the Cook House with Knotty Alder lower cabinets.  This will provide much needed storage for all of the BBQ tools and Sauces.  

Which Design would you chose? A, B or C?

By following these three easy steps below, you’ll be well on your way to creating an inviting outdoor kitchen of your own.

  1. Are you extending your Living Space?
  2. What’s Important to you? Pick your appliances
  3. What Layout works for your design? 

Now all that is left is to get this outdoor kitchen built, so that we can plan that Party!  Cheers until next week.

How did we get started?

Let me just say that building during a pandemic has become very interesting.  As a design project manager I tend to create and follow schedules.  I am very organized and like to make lists.  (It drives Andy crazy). I love being able to check things off the list as it shows accomplishment and it helps me with the creative process.

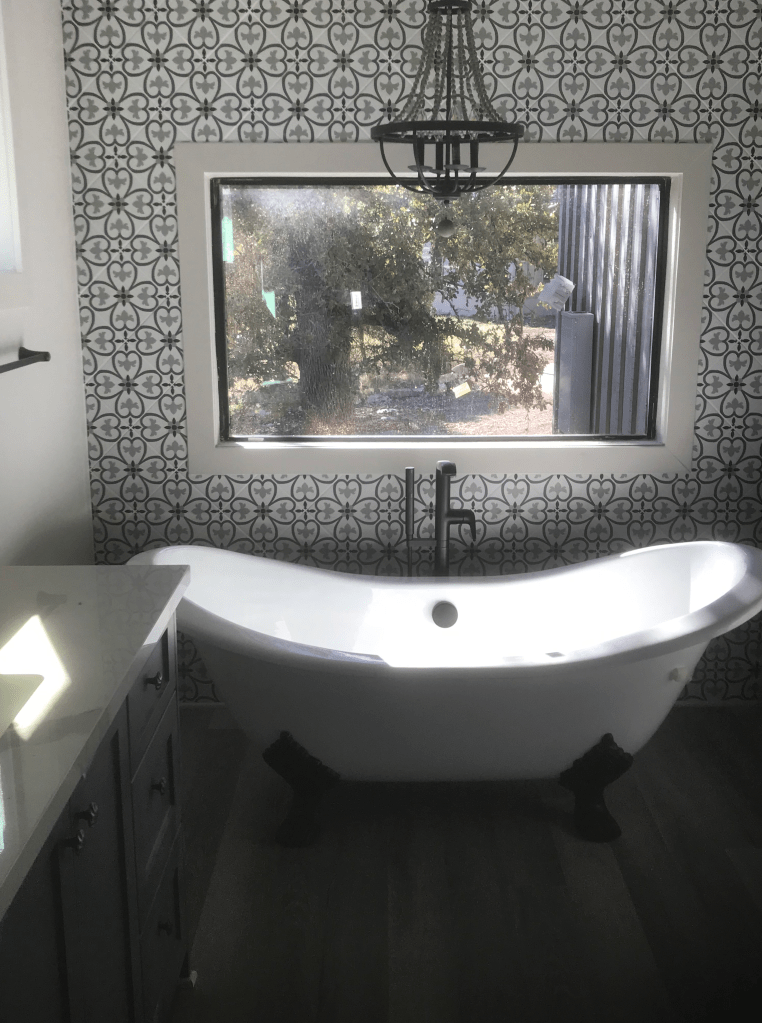
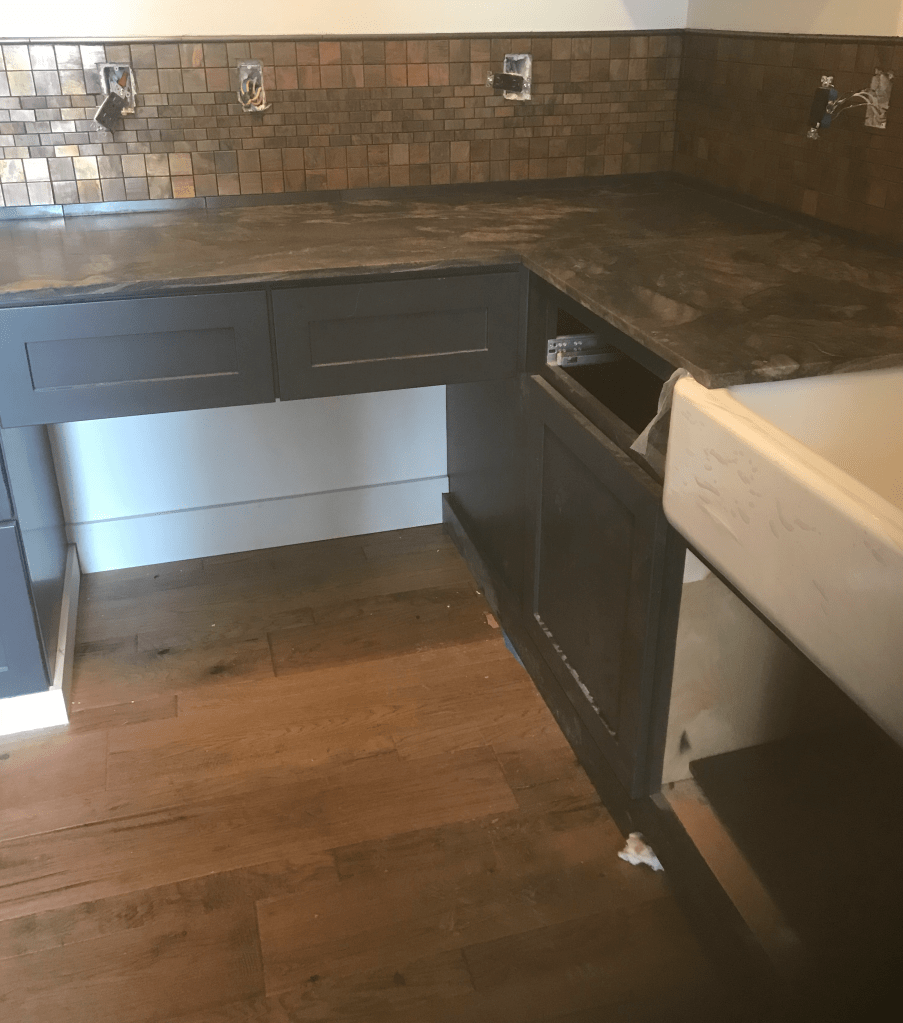
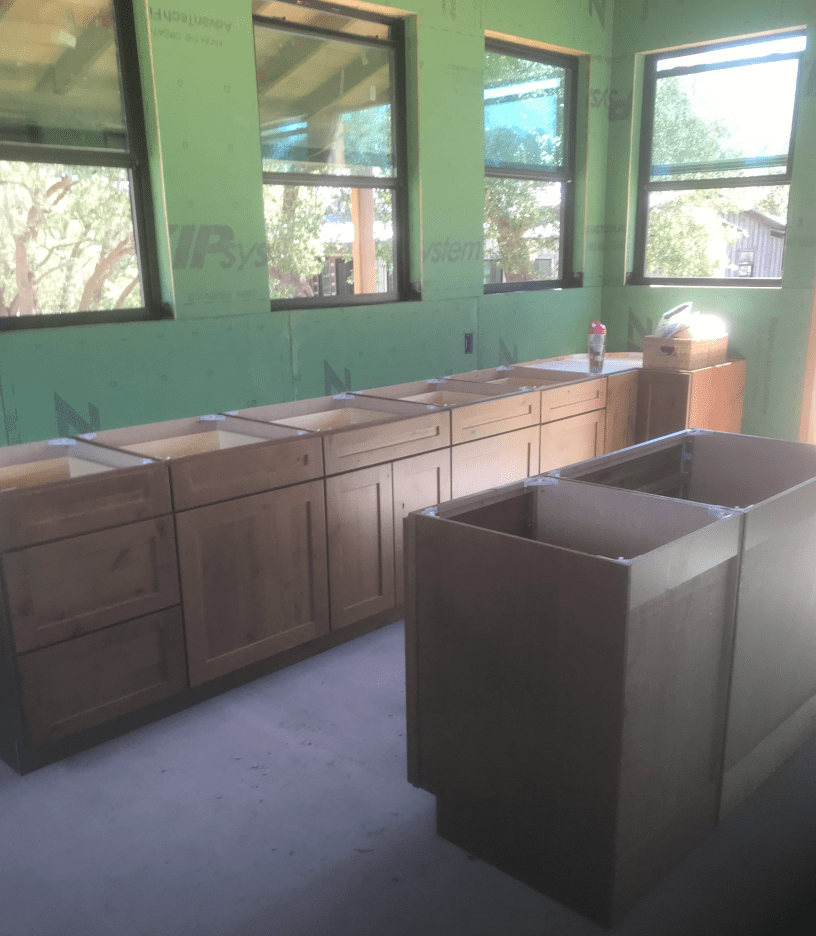
So just where did I begin you ask?  It can be overwhelming if you have not built a home, managed a renovation or even updated a room or two. I started with my own Client Questionnaire.  I needed to have a full understanding of the extent of the job.  Which room(s) or space(s) did I want to make our priority? I think you have seen from the prior posts the Kitchen/Pantry are priority for us.  How you prioritize is often based on your families passions.  Andy and I both love the Kitchen, but he also has a passion for Music/Media.  You will see in one of the upcoming installments we will be using our guest room as Andy’s Music/Media room.  It also has a very cool guest bath we are designing. 

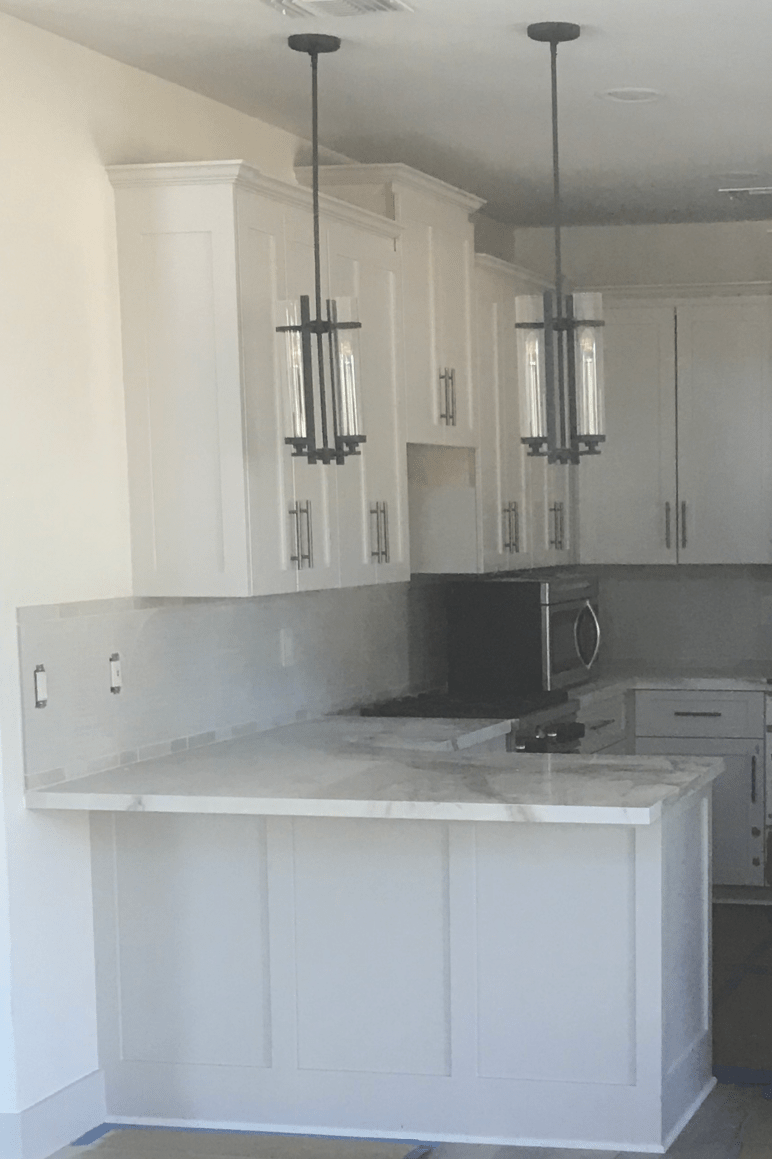
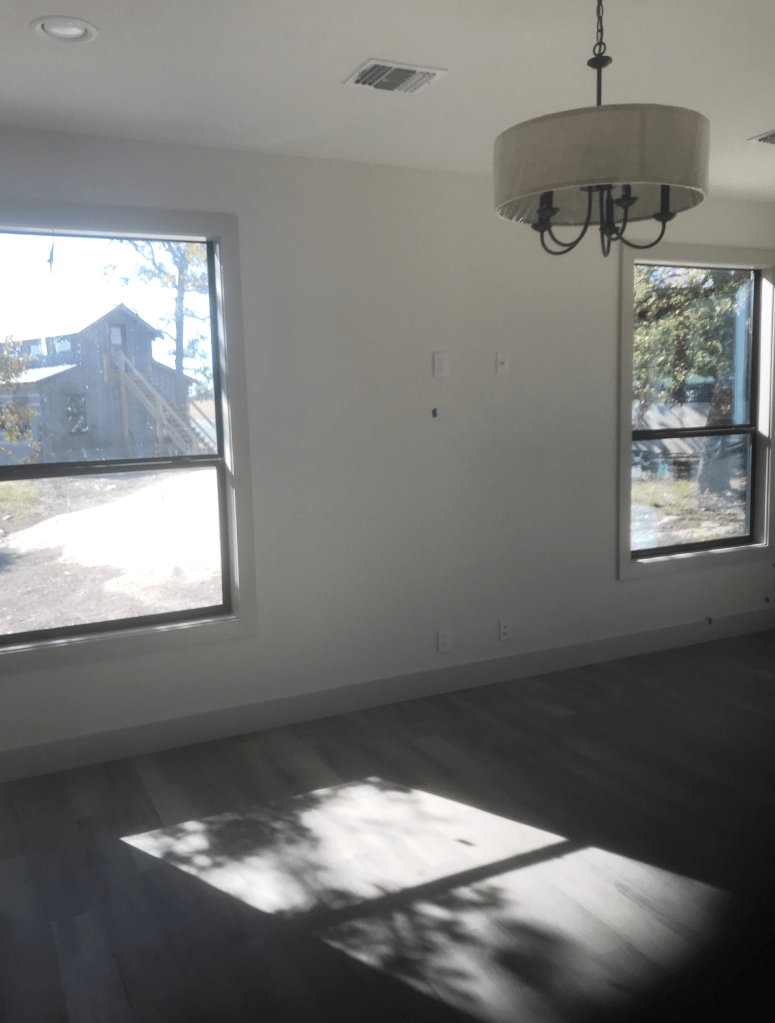
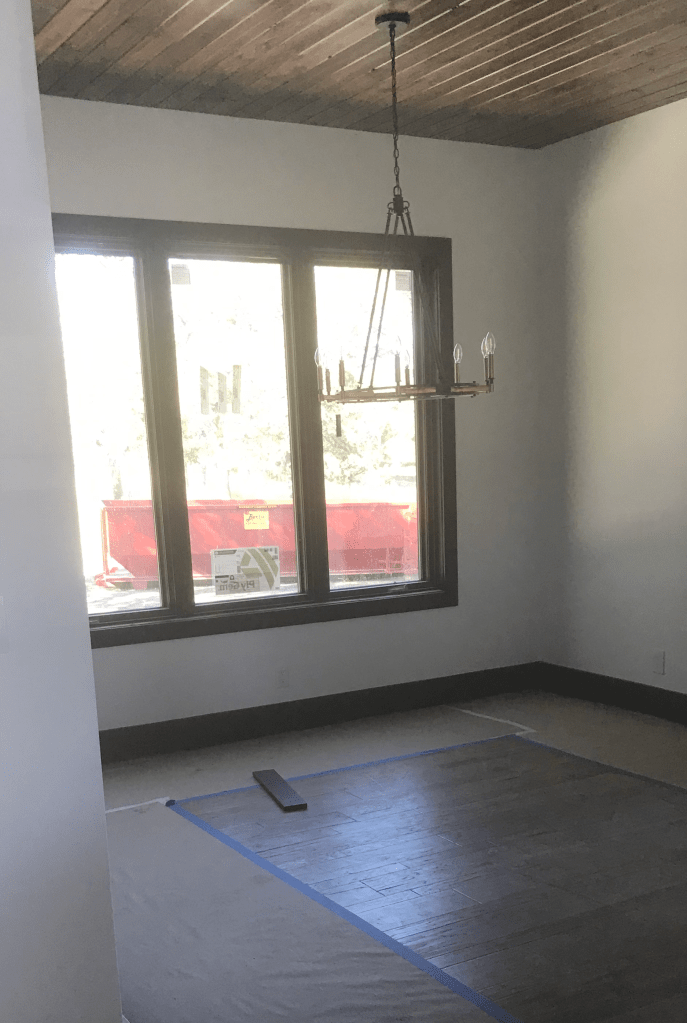
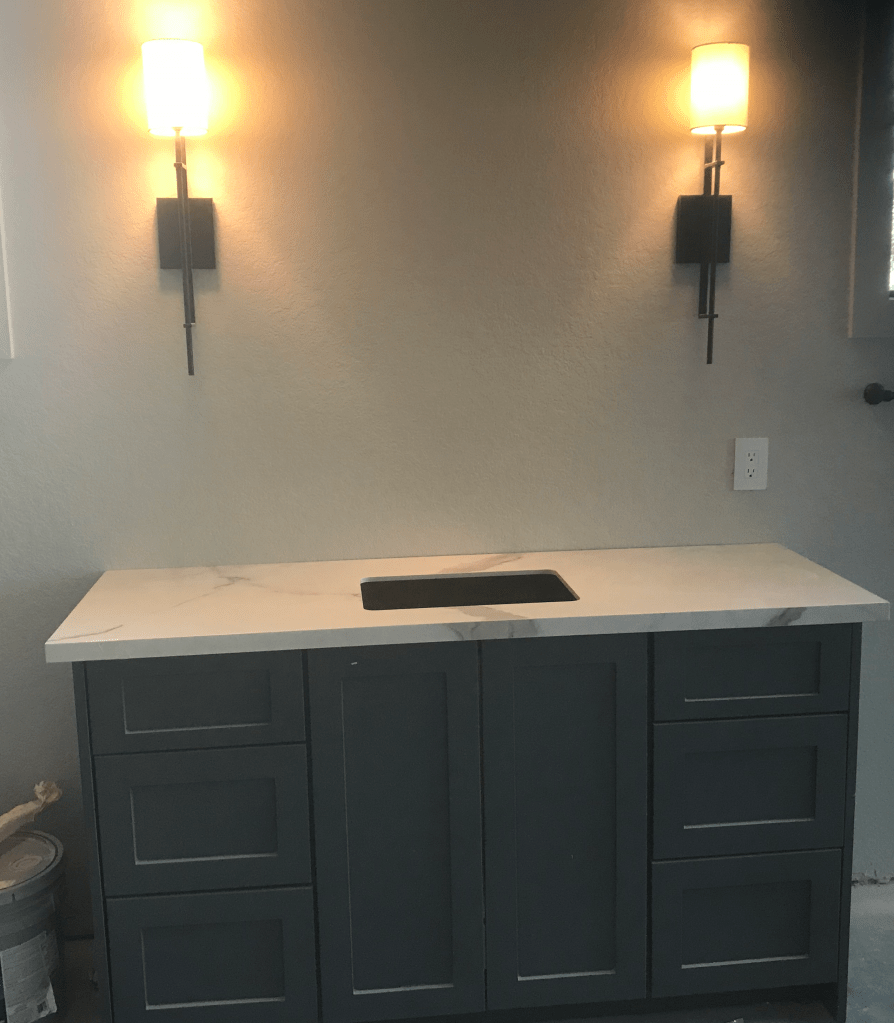
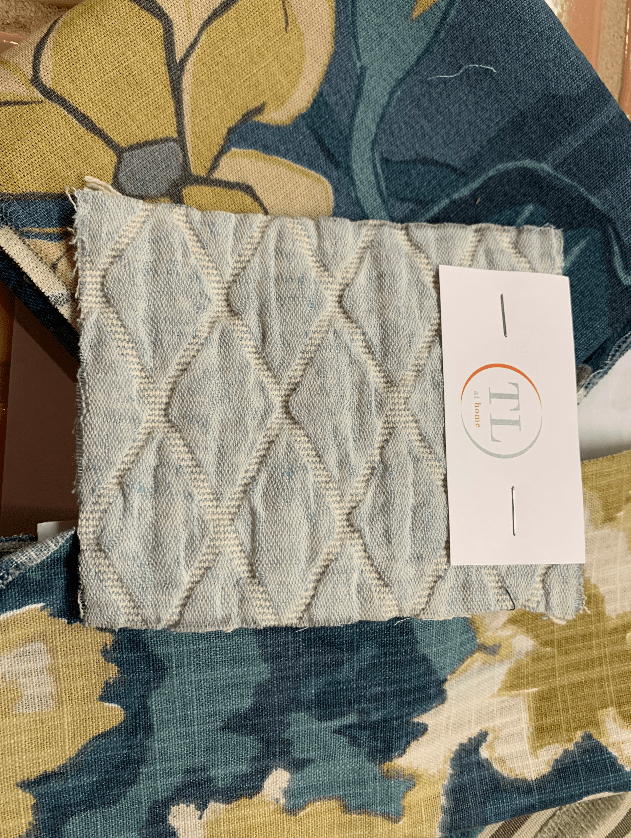
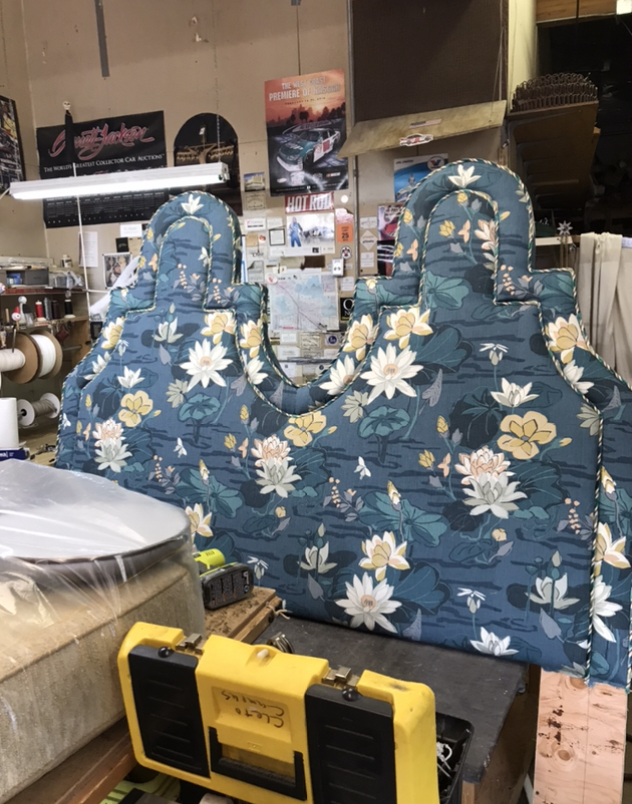
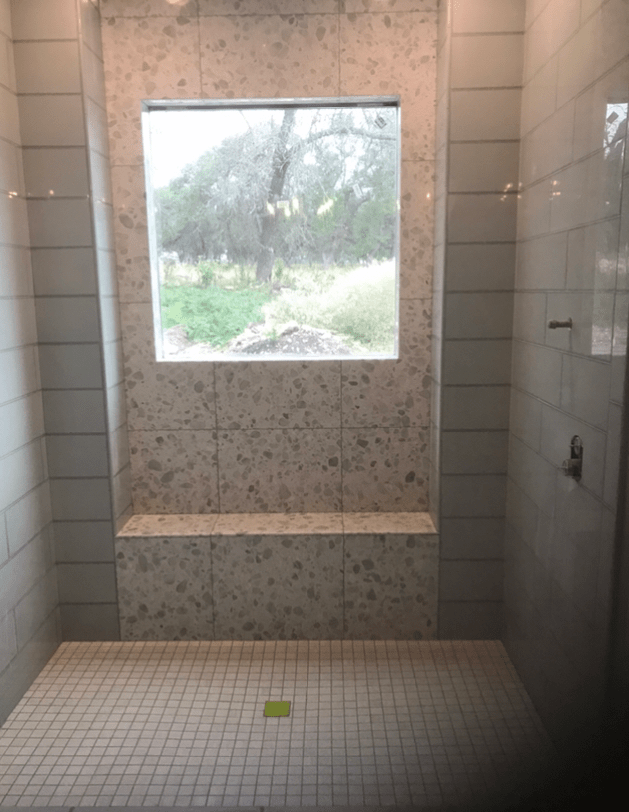
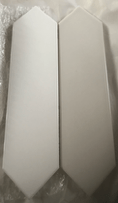
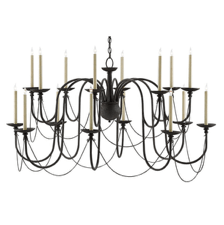
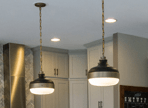
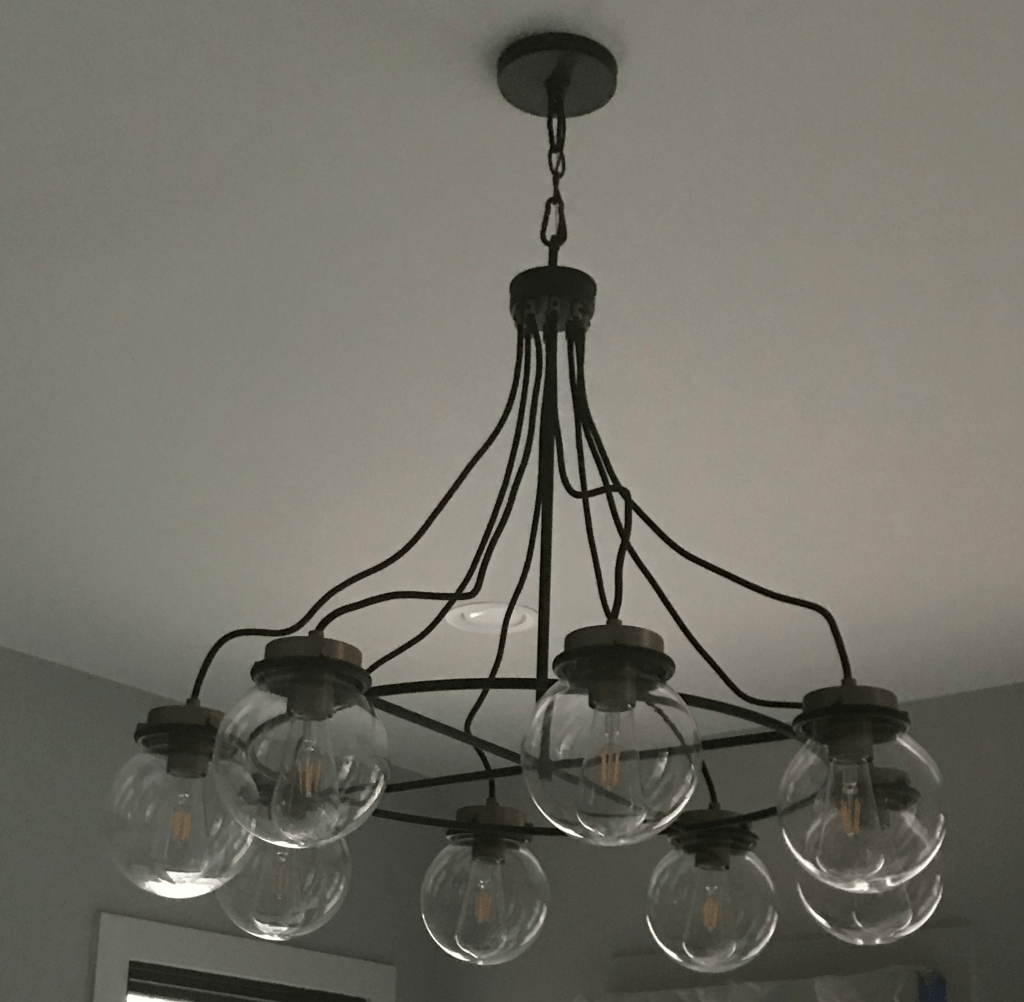
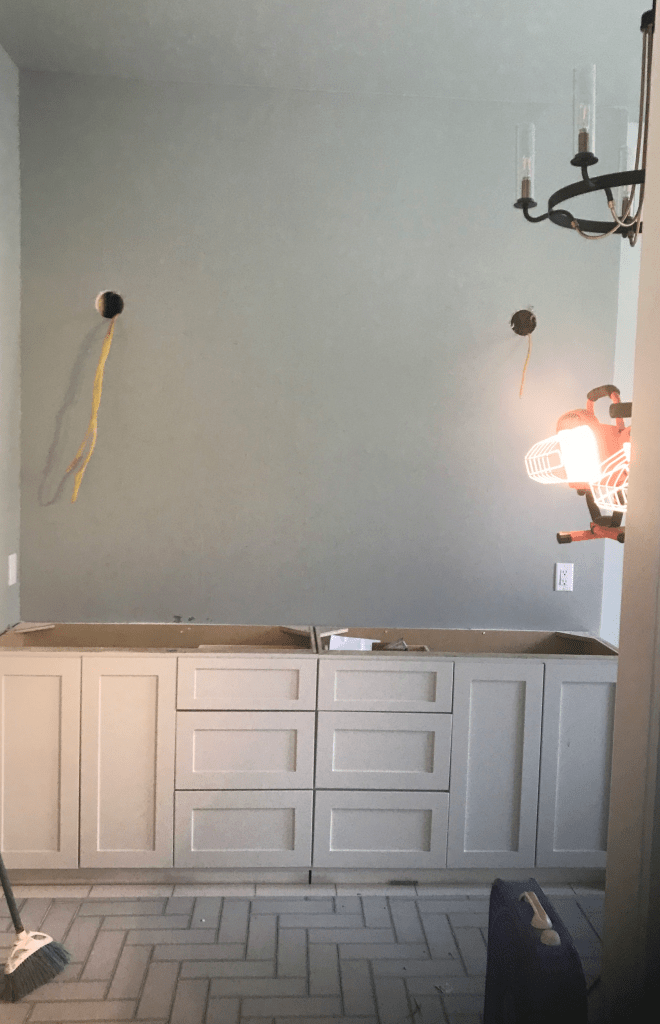
Next I asked myself what Colors do we LOVE and what Colors do we hate?  I love Color as does Andy and initially we were going with Teals and Oranges , but they felt too strong in this design (these will now be used in the design studio).  After much research on German Farmhouses of the period we will be using a more muted pallet with grays, blacks, brass and a touch of the teal in the main house. We are designing to an Urban Elegant Farmhouse Style.  We will have the wood ceilings and floors in the large living/kitchen area with some board and batten to bring a warm feeling to the space.  We are lucky as I recently did a renovation of a home in AZ and I reupholstered a number of pieces of furniture I can reuse in our new home.  I love older period pieces that can be updated in today’s look. 

After sorting thru “my personal questionnaire” we got down to the fun stuff.  I worked to create digital design boards based on the floor plans.  These boards included Paint, Flooring, Tile, Lighting, Plumbing, etc.  You have seen some of it in other posts but one day I will share where we started vs where we ended up.  I’ve used these renderings to visually communication our ideas and concepts with Scott. A major note: design will evolve during the build or renovation process.  Flexibility is also key. It’s sometimes like a game of chess – – you move 1 piece and it changes your entire perspective. 

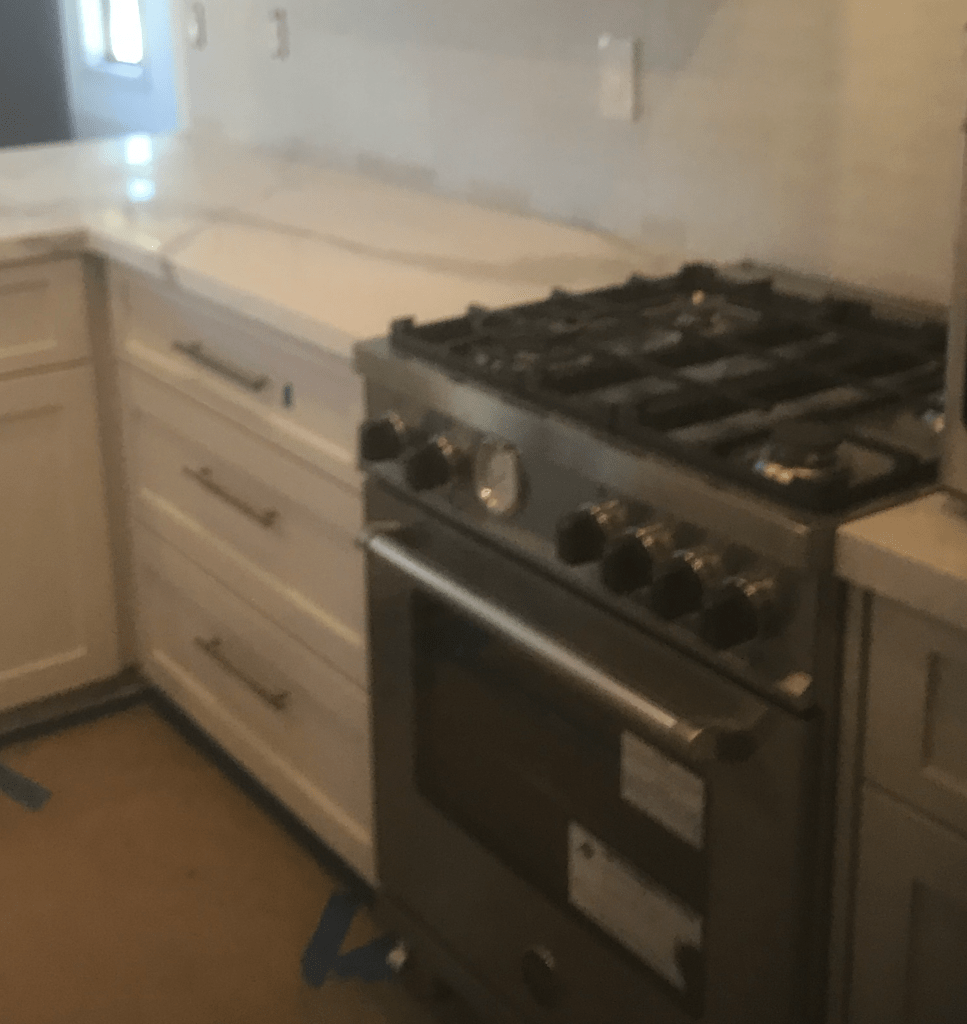
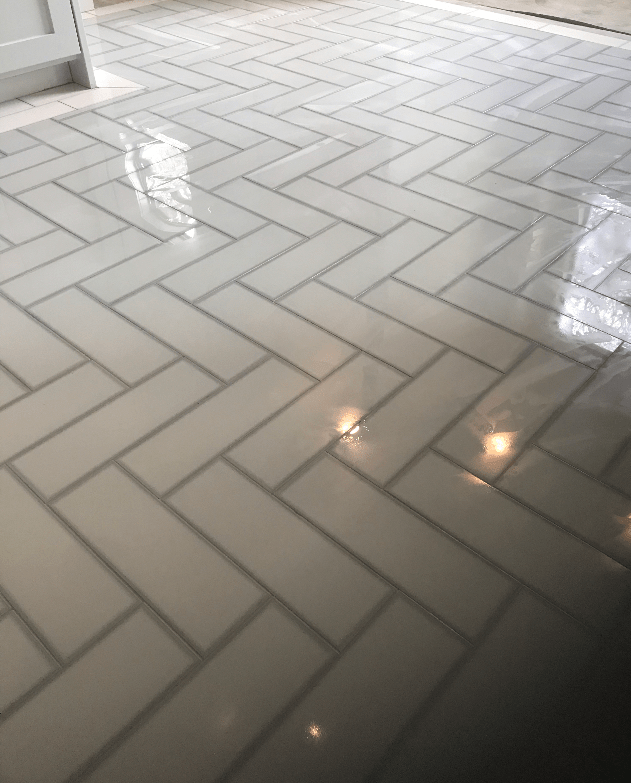
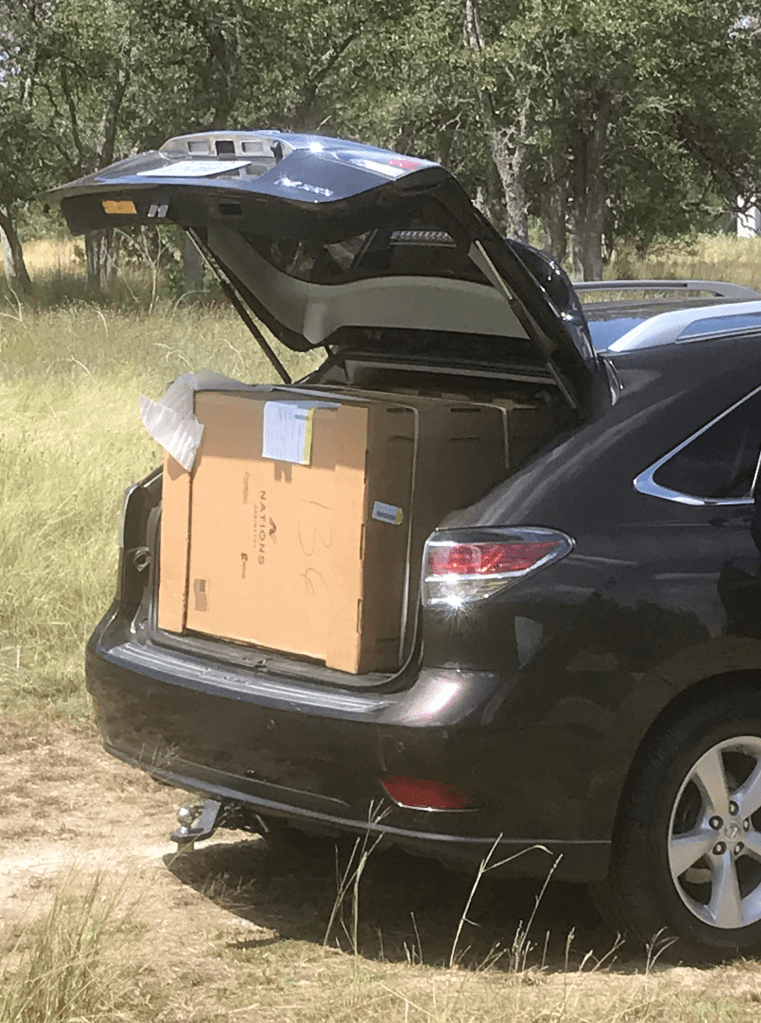
And then there is the budget.  (And yes, there is always a budget.  Maybe a bit more for those Kitchen Appliances than planned).  Once we had our vision and design concepts I was able to start pricing our selections.  I have a background in Supply Chain and Purchasing so I have used that to develop relationships with various vendors around the country.  We’ve created a build schedule with check lists to assist in making selections, placing orders and tracking deliveries.  I’ve had a couple of field trips to work on the granite, tile and paint but for the most part the majority of my work has been virtual.  I have to give a shout out to Lighting New York, AZ Tile, EMSER, Tabarka, Cactus Stone and Fergusons for their use of virtual tools.  We’ve partnered to get out ahead of this with the pandemic and these vendors have been especially helpful.  We’ve been concerned that manufacturers may have limited quantities/availability.  So far we have been able to stay ahead of the curve and within budget. BUT I received a call on Thursday from my Rep that we may need to order our GE appliances NOW.  Of all things Dishwashers seem to be the long pole right now.  

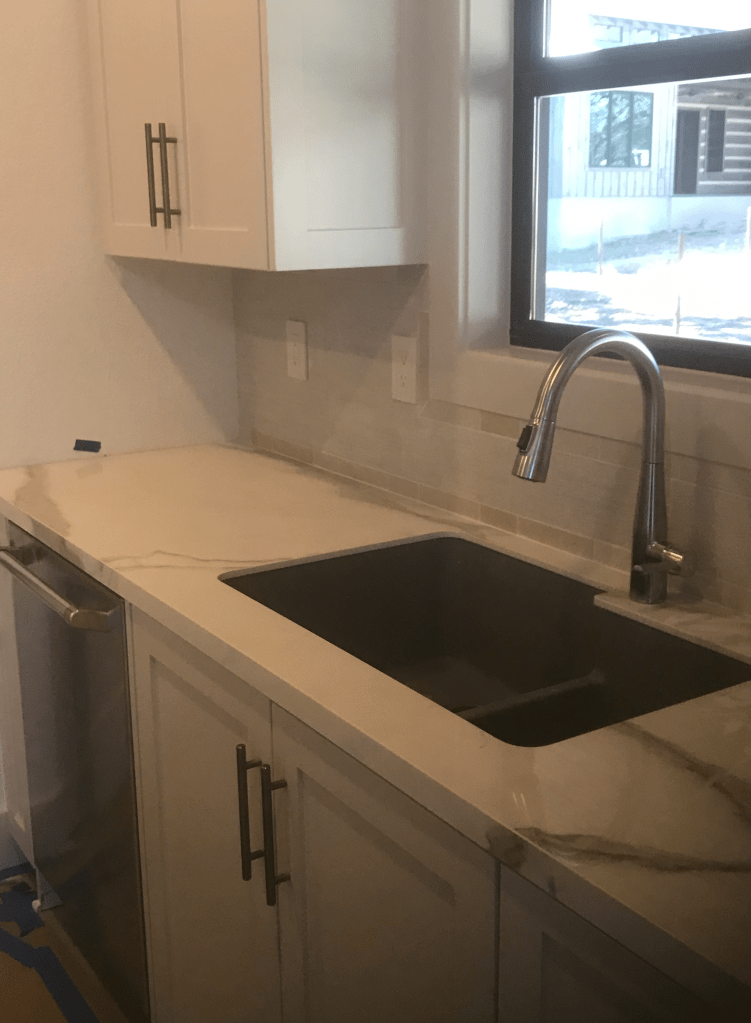
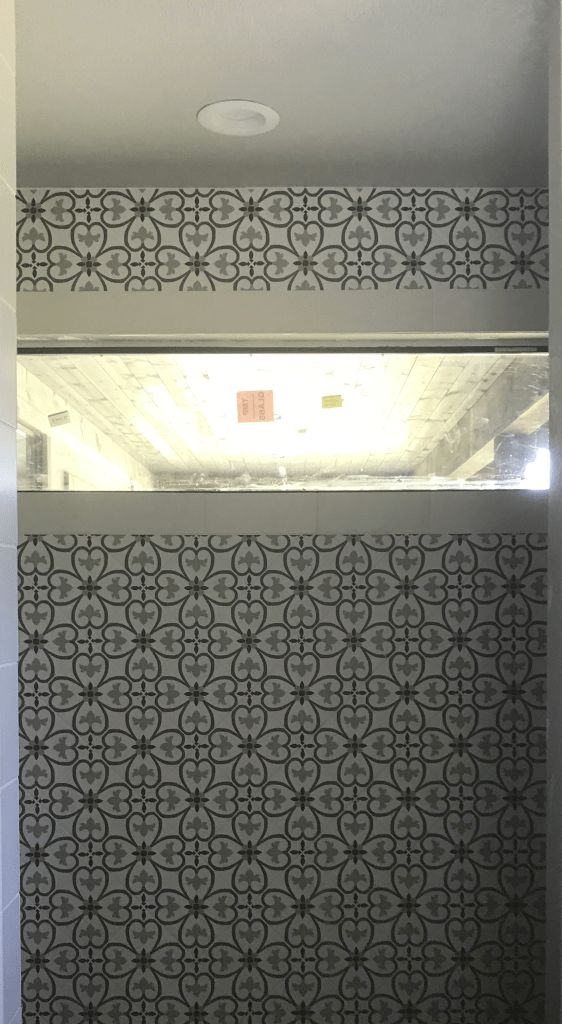
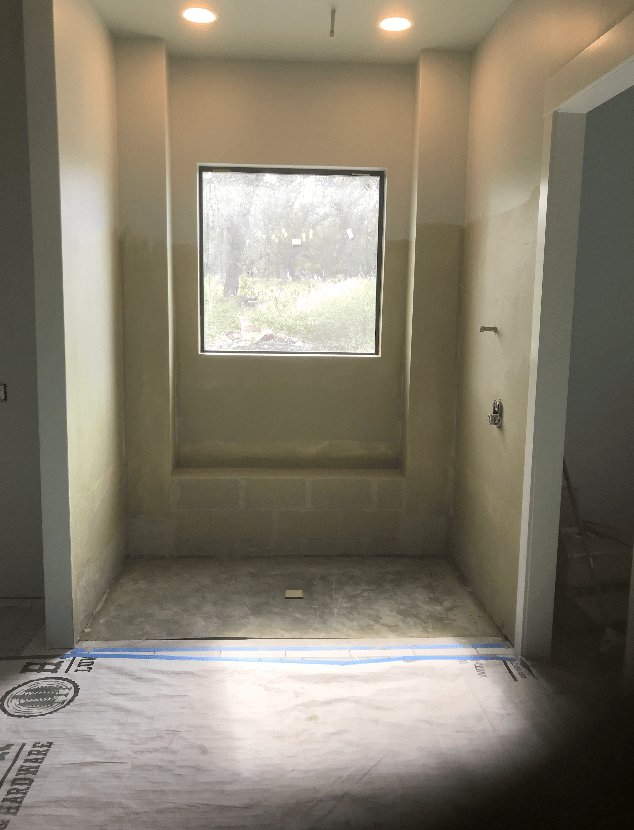
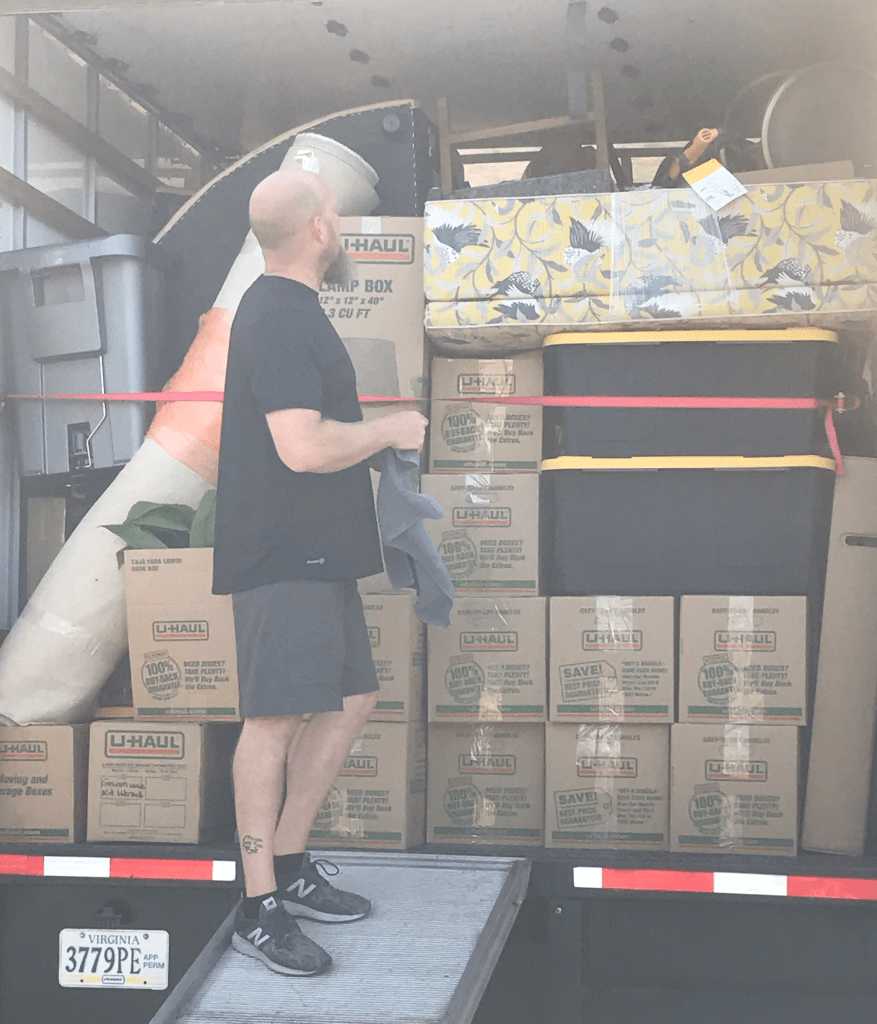
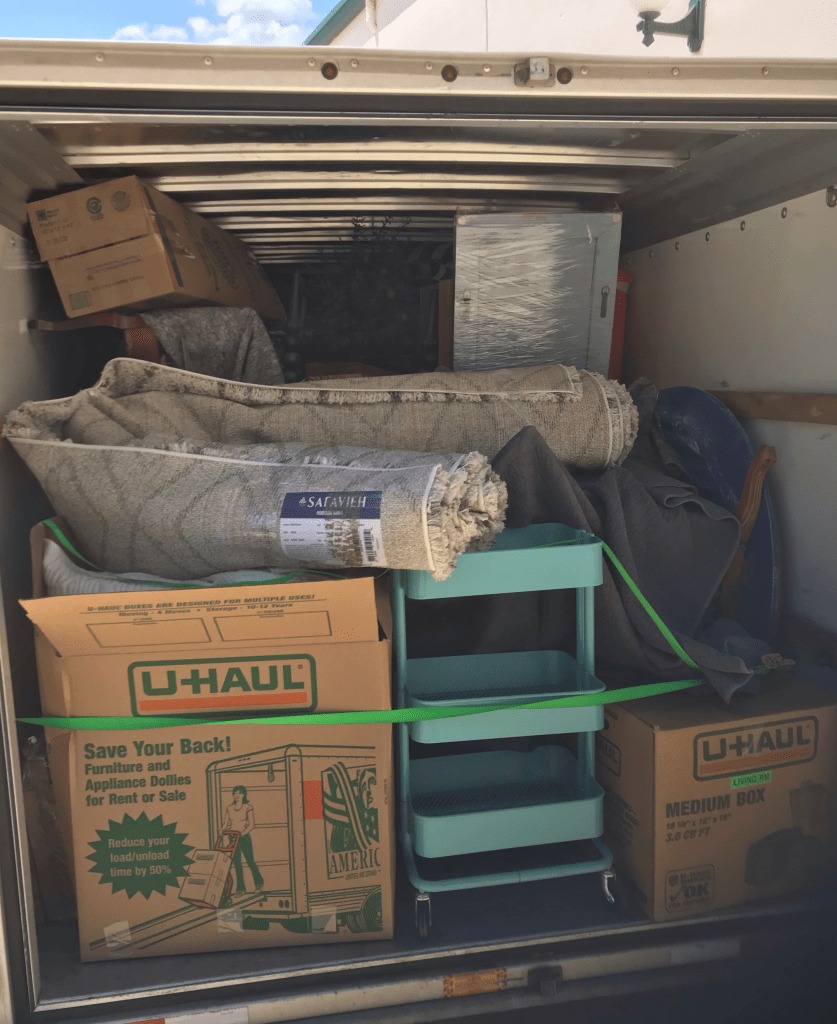
Andy and I are in AZ packing our home and getting ready for the final move to Fredericksburg, TX.  We are working closely with Scott (from afar) to coordinate the schedule, the ordering, the deliveries, and the budget.  We’ve made selections and placed orders for Plumbing, Bath Accessories, Tile, Flooring, Countertops/Backsplashes, Paint and Lighting.  Next we will be working thru Appliances, Door Hardware, Cabinet Hardware, Landscaping and various other line items to finish out the design. So far I have been able to stay within budget!

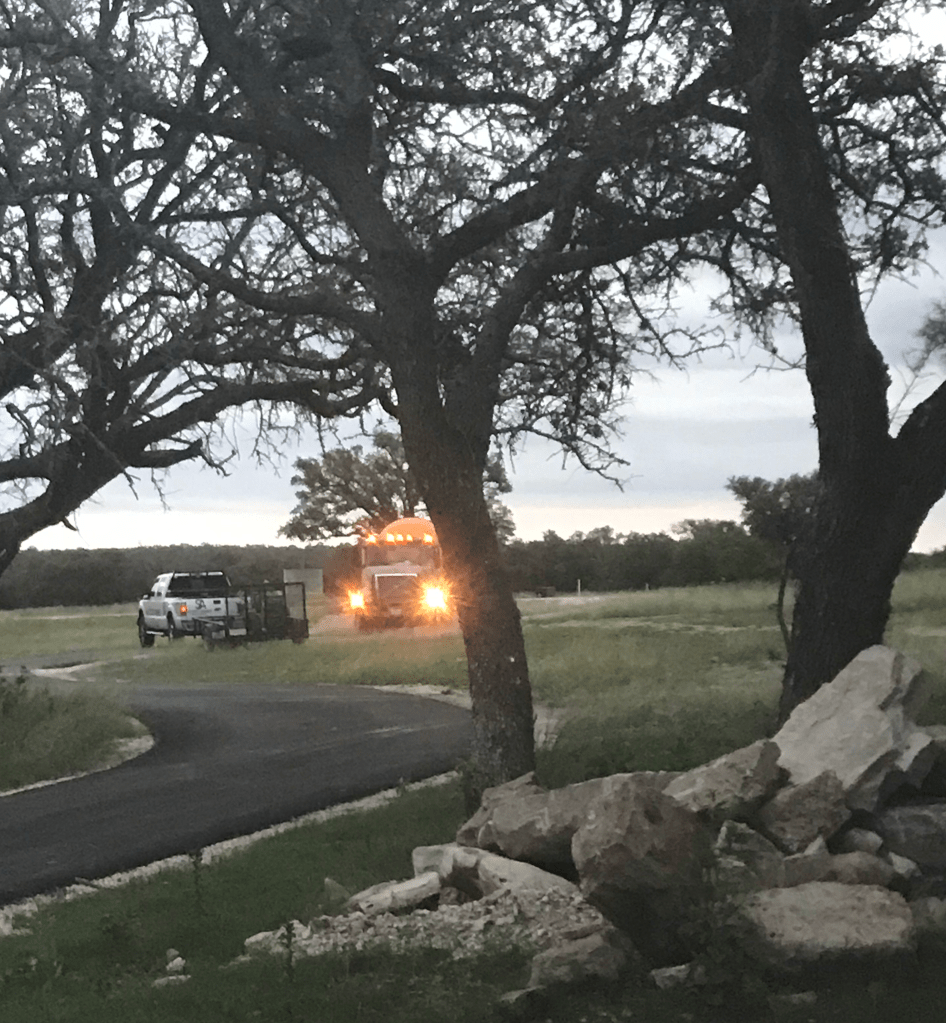
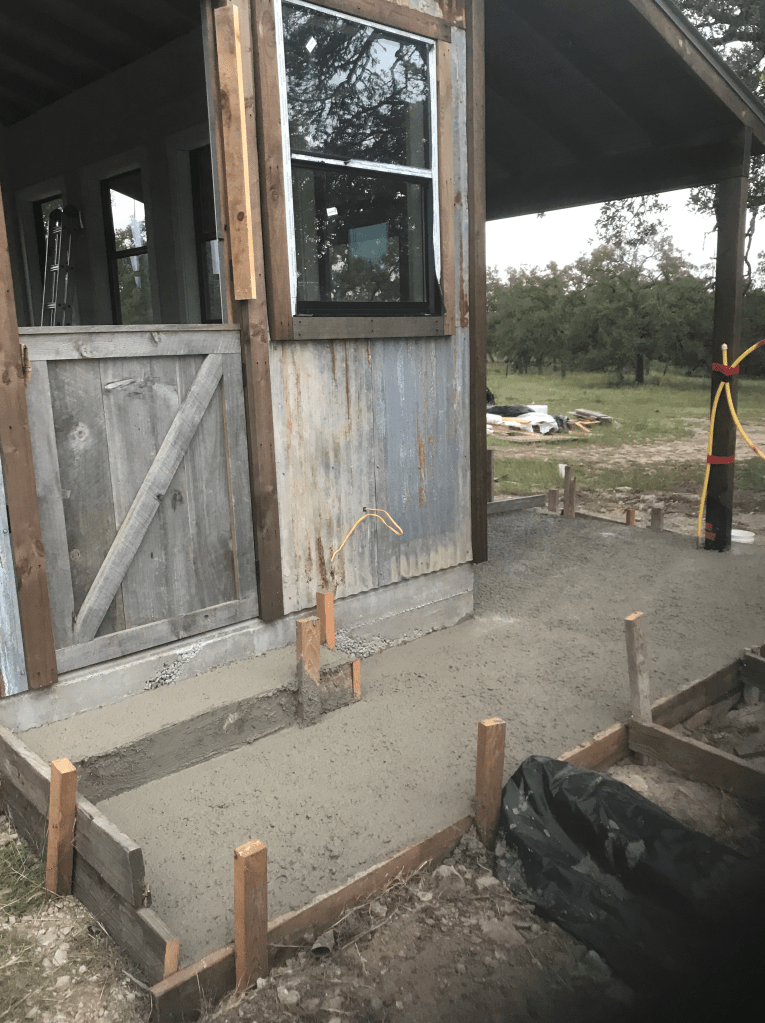
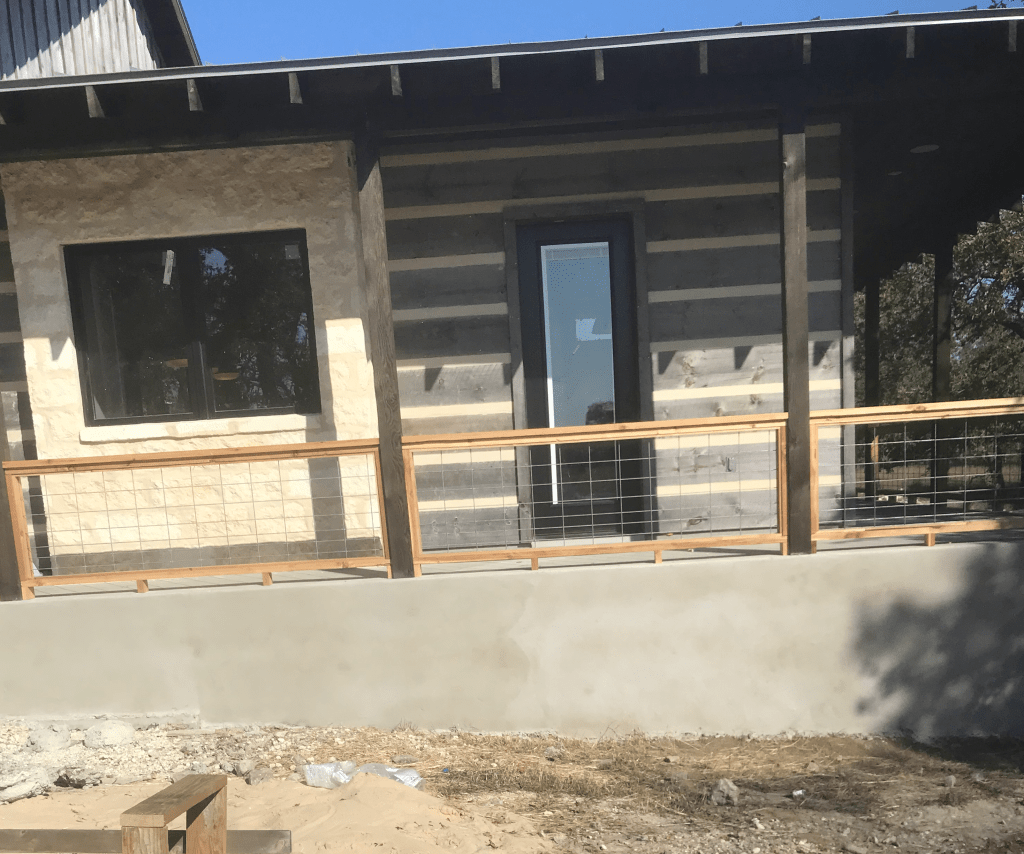
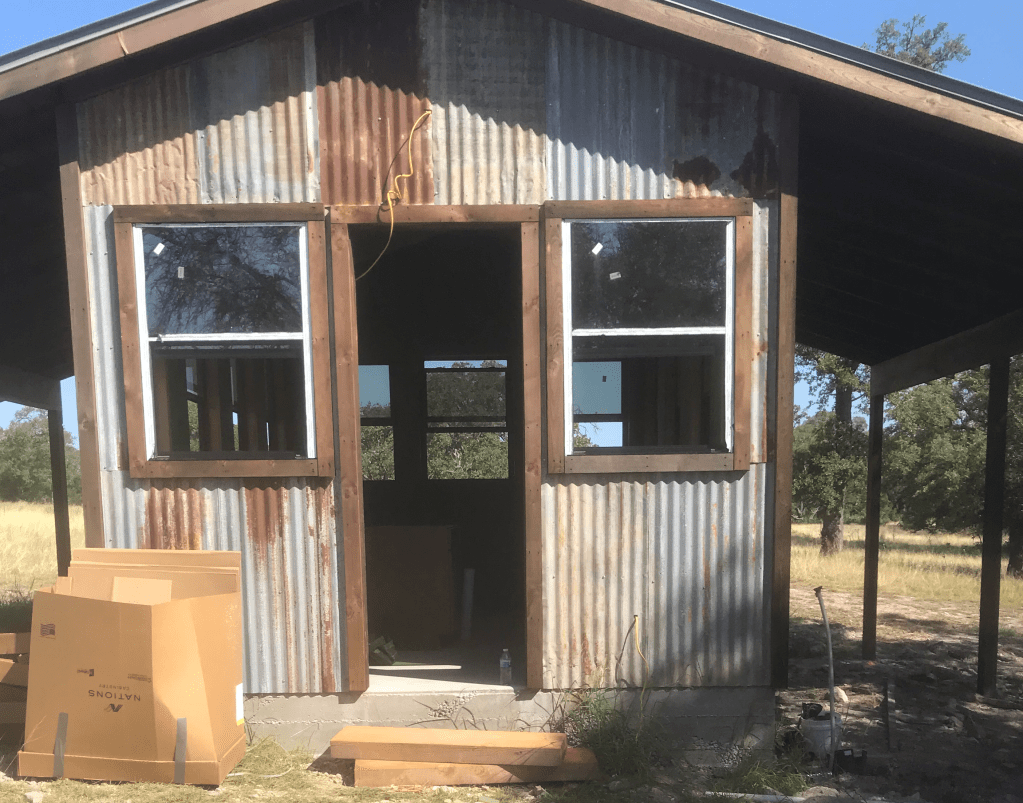
Should any of you stop by to take a peek please text me photos at 972-632-0828 or email at leweber1@gmail.com.  Many thanks to Jeff H for the recent photos and to Scott for his recent FB post with photos of the exterior – – check it out at Scott Asher Custom Homes.

If you are pressed for time or need help with your vision my design partner and I would be happy to meet with you (virtually or in person). We offer full design services to meet all of your needs, from inspiration to installation.